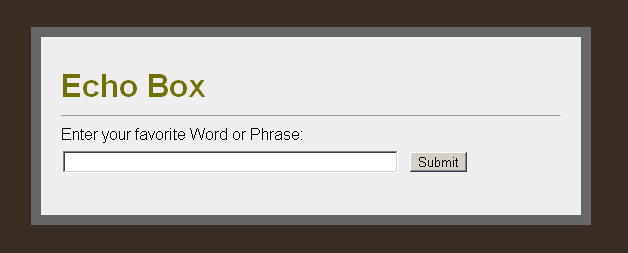
An example of a Raxan Web Application
In this tutorial, we will use the Raxan framework to create a simple web form that will echo the content of a Textbox when the submit button is clicked.
Note: This tutorial assumes that you're already familiar with the basic php programming concepts. If you're new to php please visit the Getting started with PHP web page to learn about the basics of the language.
To get started with Raxan, we will explore what it takes to create a basic web page with a few interactive elements. Make sure you have properly downloaded and configured the Raxan framework.

Getting started
To begin, follow the steps outline below:
- Create a folder called myapp inside your web root (for example: c:\wwwwroot\myapp)
- Copy the sdk/raxan folder to myapp
- Create a "views" folder for storing the your view files
Writing the code
Save the following HTML code to "views/echo.html":
<div id="pageContent">
<h1>Echo Box</h1>
<hr />
<form name="form1" action="" method="post">
<label>Enter your favorite Word or Phrase:</label>
<input type="text" name="text1" id="text1" size="50" value="" />
<input type="submit" name="submit1" id="submit1" value="Submit" xt-bind="click,echoMessage" />
</form>
<div id="echoText"></div>
</div>
The "echo.html" page will be used to display a form with a Textbox and a submit Button.
Now add a little CSS goodness to the top of the "echo.html" page
<style type="text/css">
    body {
        background-color: #392c23;
        font-family: "Helvetica Neue", Arial, Helvetica, sans-serif;
    }
    h1 {
        margin: 10px 0;
        color: #717107;
    }
    label {
        display:block;
        margin: 8px 0 5px 0;
    }
    #pageContent {
        margin:30px;
        width:500px;
        padding: 20px;
        color: #000;
        background-color: #eee;
        border: 10px solid #676767;
    }
    #echoText {
        margin: 20px;
        font-size: 25px;
    }
    #echoText span { color: #8b0b3b; }
</style>
Next, create an index page (example index.php) inside the your myapp folder. Edit the page and include the "raxan/pdi/autostart.php" file at the top. Make sure there are no leading white-spaces before the "php" tag.
<?php
    require_once('raxan/pdi/autostart.php');
?>
The "autostart.php" file will load all the necessary classes and functions that we need for our web page.
Add a page controller class to receive and handle our page request. To do this we will create a class called EchoPage that extends the RaxanWebPage class as shown below:
<?php
    class EchoPage extends RaxanWebPage {

    }
?>
Inside the EchoPage class we need to add an event listener to echo the content of the form the the page. To do this will we need to load out "echo.html" view and create the event handler to listen to click events from the "submit" button.
<?php
protected function _init() {
$this->appendView('echo.html'); // append the echo.html view to the page
}
protected function echoMessage($e) {
$message = $this->post->textVal('text1'); // sanitize input text
$message = 'You have entered <span>"'.$message.'"</span>';
$this->echoText->html($message); // echo message to page
}
?>
To bind the echoMessage event handler to the submit1 button we need to edit the echo.html view and add the following xt-bind attribute to the submit button:
<input type="submit" name="submit1" id="submit1" value="Submit" xt-bind="click,echoMessage" />
The above will tell Raxan to bind the submit button "click" event to the echoMessage method of the ParrotPage controller class.
That's it! Try running the script inside your browser to view the results.
Here's the complete code for the index page:
<?php
require_once 'raxan/pdi/autostart.php';
class EchoPage extends RaxanWebPage {
protected function _init() {
$this->appendView('echo.html'); // append the echo.html view to the page
}
protected function echoMessage($e) {
$message = $this->post->textVal('text1'); // sanitize input text
$message = 'You have entered <span>"'.$message.'"</span>';
$this->echoText->html($message); // echo message to page
}
}
?>
Using Ajax Events and auto updates
The above example sends a full page post back to the server every time you click the submit button. But if you would like to submit the page via Ajax, how would you do this?
You're probably thinking that you might have to write a JavaScript function to handle the Ajax request and updates, correct? Well that's not necessary.
To do this, edit the echo.html file and modify the "xt-bind" attribute on the submit button as shown below:
<input type="submit" name="submit1" id="submit1" value="Submit" xt-bind="#click,echoMessage" />
Notice that we have only added the "#" character before the "click" event. This will cause the server-side event to be triggered via Ajax.
Next, modify the "echoText" div element by adding the xt-autoupdate" attribute as shown below
<div id="echoText" xt-autoupdate="true"></div>
Refresh the web page and click the submit and you should see the updates without the page reloading its's entire content.
Wasn't that quick and easy? That's all there is to it.
To learn more about page event handlers and other features, see Page Request Cycle and Connecting the Dots.
Up Next: Page Request Cycle